Share
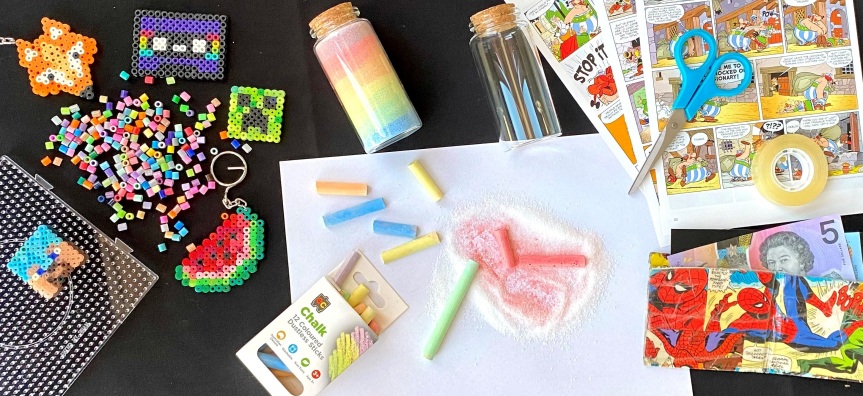
Keep busy making rainbow salt jars, iron on bead decorations and a comic book wallet. This kit has something for everyone.
Included in your kit:
- 1 x iron on bead peg board
- 1 x bag of iron on beads
- 2 x squares of baking paper
- 1 x key chain and loop ring
- 2 x glass jars with cork stopper
- 1 x portion of salt
- 1 x pack of chalk
- 1 x pages of a comic book
- 1 x roll of sticky tape
- 1 x glue stick
- 1 x Velcro dot
What you will need:
- Scissors
- Scrap paper
- An iron
- Pliers for the iron on bead key chain
Method:
Rainbow Sand Jar:
- Fold a piece of paper in half to create a crease.
- Pour or spoon some salt in the creased paper.
- Take your chosen chalk colour and rub the chalk back and forth across the salt until you get the desired colour.
- Using the creased paper as a funnel, carefully pour the salt into the jar.
- Using a fresh piece of paper or the same one, begin your next colour.
- You can pour your salt at angles or flat layers as you go. Tap the jar to achieve flat layers, don’t shake.
- Keep going until the jar is fill to the top shoulder and add the cork lid tightly.
Iron On Beads:
- Choose your design from the ones we have suggested or create your own.
- It’s helpful to pour your beads into a bowl or a plate to sort the colours.
- Slowly and carefully, place the bead with the hole face up on a peg on the board.
- Once your design is finished, it’s time to iron and melt them together.
- Place the baking paper over your design.
- Using a dry iron on medium setting, move it slowly in a circular motion over the design.
- Lift the baking paper to see if the design has melted together, if not iron for a little longer.
- With the board still attached, flip it over so the baking paper is on the table and pull off the peg board.
- Place another piece of baking paper on top of your design and repeat the iron process to melt together.
- Leave to cool.
- Remove baking paper.
If you want to add the key ring:
- Thread the open small ring into a bead hole (pliers are recommended). It’s best to put it through a bead that is not right on the edge, in case it pulls off with use.
- Thread the last link of the keychain through the ring.
- With a pair of pliers close the ring together.
Comic Book Wallet:
- Cut out the template on the black border. Fold the paper along the middle fold, so you have a crease.
- Pick you comic books pages.
- Starting on 1 side of your template, put glue on the paper first then stick down your comic image. Remember one side will be the inside of the wallet so use your favourite images on the side that will be facing out.
- Once 1 side is completed, turn over and use scissors to cut out the template again if your comic pages have gone over the edge.
- Repeat on the reverse side, gluing down the comic pages and cutting out the template again.
- Use strips of sticky tape to cover your entire comic book wallet, like you’re contacting a school book. Trim excess sticky tape.
- Fold the middle fold over and use tape to secure the edges together to make your wallet note section.
- Fold wallet in half and use a Velcro dot to secure closed.
If you want a pocket:
- Cut out the pocket square from template and follow process of gluing down page, trimming and covering in tape.
- Line up your pocket to half the wallet and use sticky tape to tape down. Remember to leave the top slit open to put your cards in.